Have you ever wanted to sew your own clothes but weren’t sure where to start? Have you sewn a few things and loved them but wished you could sew ALL of your own clothes? So did I, so I started thinking, “How can I sew more efficiently so I can produce more clothing in a short amount of time?” And thus a system I like to call “Batch Sewing” was born.
Batch Sewing
Batch sewing is taking a couple of patterns and then sewing multiple items Ford factory style. Just like the Model T, we break the sewing process down into increments and work on one part at a time. The trick is to work on a whole batch of that same part during each step, this way you finish with many items instead of spending about the same time and ending up with just one.
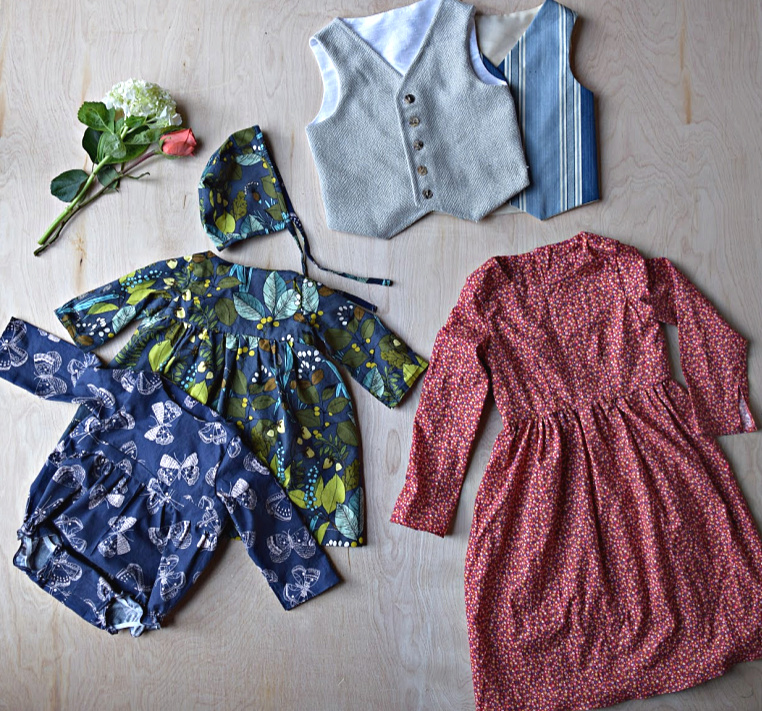
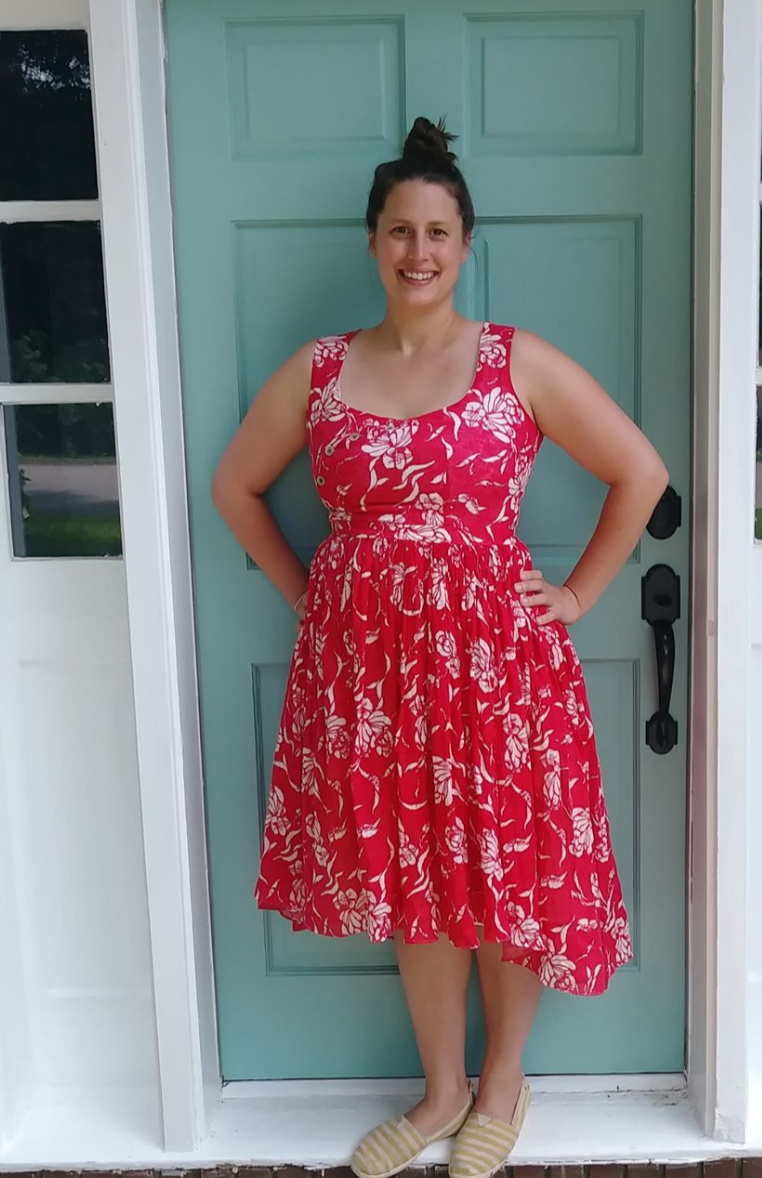
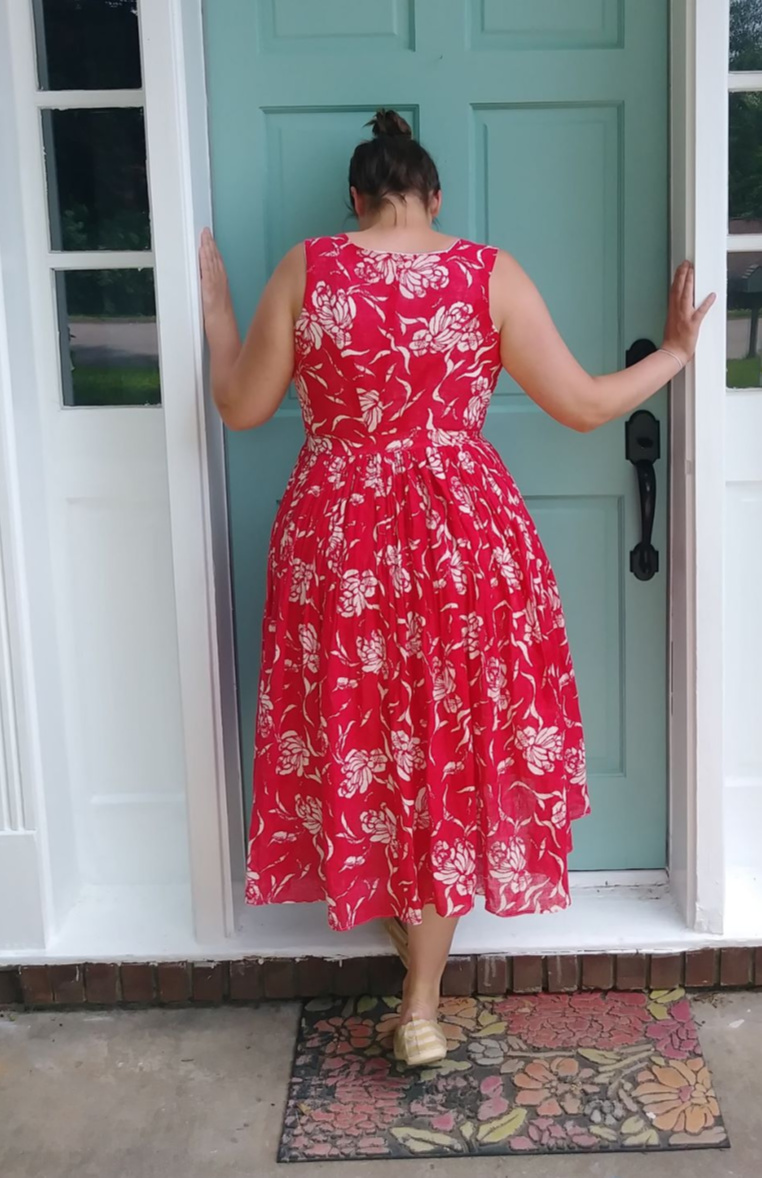
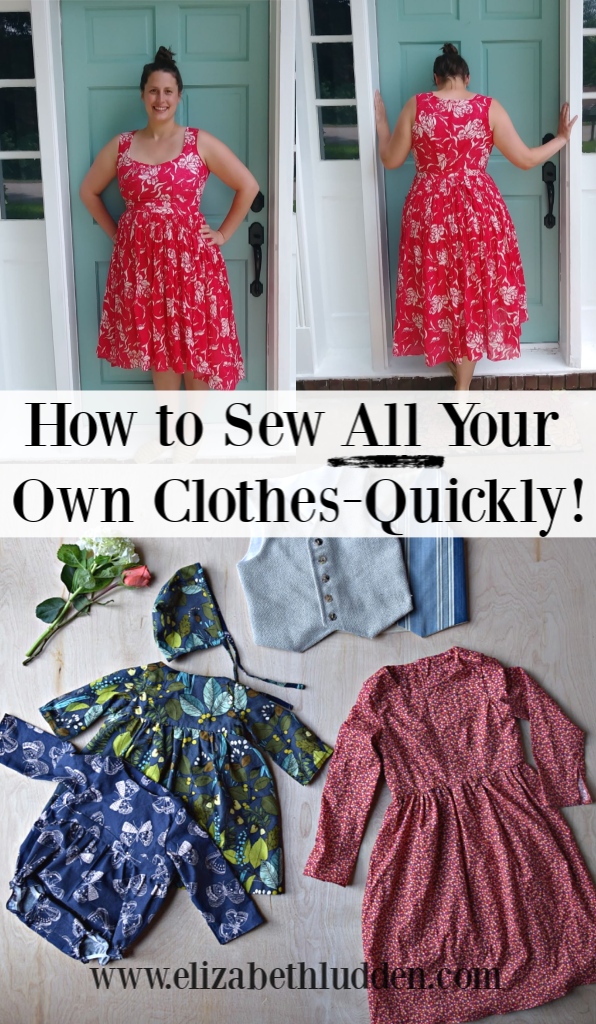
I have just started using this method myself so you will get to follow me in my journey as I, too, am beginning the process of sewing my own and my family’s clothes. In just a few weekends I have been able to make two vests for my son, a dress for my oldest daughter, and two little outfits for my baby.
It can be very rewarding to sew your own wardrobe. The fit of your clothes is much better when you make them yourself, and when clothes fit well they look great. Sewing your own clothes gives you the freedom to choose whatever style and color pallet you want rather than being limited to whatever is on the rack that may or may not fit you. Here is a post I wrote about the many benefits of sewing your own clothes.
How to Sew a Batch of Clothes
1. Choosing Patterns
The first thing you need to do is pick out patterns and make sure that they fit. This and the next step, pattern fit, will be the most time consuming steps but they are, by far, the most important steps when sewing your own clothes.
Pick patterns that you really like and that you will actually feel good about wearing. There is nothing more discouraging than coming to the end of a project just to realize that the style clothes you worked so hard to create aren’t a style you actually enjoy wearing and fits poorly.
Take a moment and go look in your closet. Better yet, look at what you are wearing right now. It is most likely a favorite of yours. Look at different aspects of your wardrobe, day wear, evening wear, business casual. Do you have clothes that you really like but have always felt like they could fit better if you just made them yourself?
What Style Clothes Do YOU Like?
Is there a style you like but haven’t been able to try because you just can’t find it off-the-rack? If so, try to find pictures of models with similar body types as you wearing the style of clothes you want to wear and ask your self “Do I like the way this style looks on my body type?”.
A good place to start is casual/ day wear. Pick some items that are more on the comfortable side. And if you are wanting to sew a capsule wardrobe, find patterns that compliment each other that you can wear together or pair with items you already have. It is a great way to cut down on the amount of clothes you have and it takes the battle out of finding an outfit in the morning.
Sew With Patterns That Are Easy to Follow
Find patterns from companies that you have tried before and feel comfortable following their instructions. It’s also good to use patterns that fit your shape relatively well (if not, that’s ok, fit will be addressed in step two).
Every Body is Beautiful
If you are feeling discouraged about how your body looks in certain clothes, then perhaps you will find this post about the real reasons our bodies are beautiful uplifting.
Once you have picked out one or two patterns it’s time to make sure they will fit your beautiful and unique shape.
2. Pattern Fit
Making sure that your patterns fit YOU is essential when sewing your own clothes. I will be creating a post entirely dedicated to this issue soon but there is a lot on YouTube to get you started. I will link to some videos in a bit
Determine what kind of fabric you will be sewing with and then buy some inexpensive fabric to practice with and make a “mock up” or practice run of your pattern.
If your pattern is for something with woven fabric like a cotton dress or slacks or button down shirts buy some inexpensive muslin of a light solid color (you will be marking it so a patterned fabric will make this process difficult).
If you are making things like T-shirts buy some inexpensive and light-colored jersey cotton. And if you are making athletic wear you will need some kind of light-colored Lycra (the fabric used for bathing suits and leggings).
You will look at the back of your pattern and by YOUR measurements determine what sizes you will need.
Using More Than One Size For a Better Fit
Now this is the important part and the part that will really make your clothes fit. Your bust, waist, and hip measurements might be three different sizes, and when sewing your own clothes, you can actually use all three sizes with one pattern! How wonderful is that?!
Write down what size your bust measurements put you at with your pattern, write down what size your waist measurement puts you at with your pattern, and write down what size your hip measurement puts you at.
Lay your pattern out and, with a pencil (something you can erase) mark the line for your bust size.
Next mark the line for your waist size.
And finally, make the line for your hip size.
Next, connect the lines in a smooth way and you have a custom fit pattern! You can either free-hand this redrawing of your pattern or use a french curve to connect the different sizes .
Adjusting the bodice and bust of a garment requires a little bit different approach. Here is a link to an excellent video that shows you how to adjust the bust of your patterns.
Now you can go on to sewing your mock-up with your practice fabric.
What’s a Mockup?
A mockup is a quick test run of your pattern. When I make a mockup I only sew the main seams and I usually only add one sleeve. It’s just enough to be able to determine if the pattern fits you. If it doesn’t, this is where you can work out all the kinks.
I’m in the process of making a video about just how to make adjustments to your mockup, so stay tuned. Go ahead and sign up for my newsletter if you’d like to be notified when I get these videos out. You can sign up to the left of this post.
Spend as much time as you need developing your pattern fit. It really makes the difference. Otherwise, you are just making more off-the-rack clothes, because patterns, too, are made by averaging sizes.
Pin your ready-pattern pieces to a bulletin board in your sewing room, one pin through each pattern so they are ready to go when it’s time to cut.
3. Decide How Many of Each Pattern You Will Make
The last batch I sewed six items. Two vests for my son, one dress for my six-year-old daughter, a dress and romper (from the same pattern, I just left the skirt off one), and a bonnet for my baby.
If six sounds ambitious try making three or four items for your first project.
You could make two tops and two pairs of pants. Or two shirts and a dress. to name a few. Use one pattern for the two tops and one pattern for the two pants. Now you’re batch sewing!
4. Choose Fabric
Choose fabric for each item you are making. If, for example, you are making two tops and two pairs of pants you might want one black and one white shirt. And one pair of blue jeans and one pair of black jeans. So buy the fabric you will need for each piece you are making.
When buying your fabric, check the end of the bolt for washing instructions and take a picture. You won’t have tags in your garments so this can help later on to avoid destroying your hard work in the washing machine, especially when sewing with precious fabrics like silk or wool.
5. Wash All of Your Fabric (Unless Its Dry Clean Only*)
Before you start sewing your clothes you need to wash your fabric.
Pick a time that you can sit by the washer and dryer and wait for it, because once its dry you will need to take it out right away to avoid having to iron out yards and yards of fabric. Ironing tough wrinkles can add three or four hours to your project depending on how much fabric you have! If you are able to safely wash your fabric do so now, especially for cotton and other natural fibers such as linen and hemp. This will allow the fibers to shrink before you sew them and not pucker at the seams.
When drying the fabric you want to be seated within earshot of the dryer. So put some Netflix on and pull out your knitting while you wait for your fabric to dry.
When the dryer dings, get up, get a friend to help if you can, and pull the fabric taught to its full length, fold it the way it had been when it came off the bolt, hotdog-bun style with selvage edges together. Then, fold that up into loose, flat sections. This will keep your fabric flat and relatively wrinkle free until you are ready to use it.
6. Iron Fabric
Iron all the fabric you picked for your projects. This should be a relatively quick process if you folded them straight out of the dryer.
 | Oliso Pro Press Iron – TG1600 – $199.99 Oliso Pro Press Iron – TG1600 |
This is the point where sewing assembly style to make a large batch really takes off.
7. Pin Everything! (unless you are sewing with jersey)
At this step you will pin all of your patterns to the fabric, not cut them, pin them.
If you pin everything at once and set it aside you will waste less time pulling out your cutting tools, cleaning up scraps, laying out fabric, pinning, getting out cutting tools…. and on and on.
Pin everything and set it aside.
You can stack up some thinner fabrics and cut out multiple pieces in one go, but be careful not to stack it too high because the thickness of the fabric will bump up with the pins and distort the shape of the pattern when you cut it.
The only time you wouldn’t do this is if you are using pattern weights with jersey fabric. Go ahead and cut once your weights are in place.
8. Cut Everything
At this point you can go ahead and cut everything.
Stack all your pattern pieces in neat piles, then stack all of those piles on top of each other. I have a small set of drawers next to my sewing table that I set this stack on and that way I can pick up one outfit at a time for each step.
A small basket or open box on the corner of your sewing table would be a great place to keep your pieces while you are working.
Neatness is key when sewing so many items at once; you don’t want to waste your time searching for pattern pieces. So, keep your items together by outfit and after each step put them all back into your basket or pile.
9. Pin Together All Major Seams According to Your Pattern’s Instructions.
Read your patterns and figure out what the first 2-3 seams you need to sew together. Then, take your pattern pieces and pin all of those seams accordingly.
Lay them back in their basket or designated pile.
Once all your garments are pinned you can get your machine out for step ten.
10. Sew Pinned Seams
At this point you can sew all of those seams together according to your patterns instructions.
But wait! How will I sew all of these if I need thread of different colors for different garments?
Unless you are sewing with white fabric you can save a lot of time (and money) sewing with neutral colors. Beige, greys, and cream colored thread can work well when sewing with a number of different colors of fabric.
Pick Neutral Thread to Save Time
I pick a neutral thread that will not be noticeable with all the fabrics I’m working with. This way I don’t waste time changing the threat between each garment I am sewing.
The only time I take the time to change the thread is when sewing the final details such as button holes, buttons, and top stitching.
With side seams, though, I do not waste my time sewing with a perfect match.
Note **When sewing items with pockets you will more than likely have to do some top stitching before you sew them in. Refer to step twelve for quick and easy top stitching**
11. Repeat Step Nine and Ten Until Garments are Assembled
Once your main seams are sewn read your pattern to find out what seams come next. Pin all of the next seams at once. Sew the seams of each garment, one after another, until they are completely assembled. Leave their finishing touches undone, such as button holes, buttons, and top stitching.
Some garments might require a zipper and that is usually a construction step so include all zippers in steps nine and ten.

12. Finishing Touches
At this point you should have completed garments that only need button holes, buttons, and top stitching.
Line up all your thread colors but keep a good neutral color in your bobbin. That way you can simply change out your top thread with each item.
Sew all your top stitching .
Then sew all your button holes.
Then sew all your buttons.
You Can Sew All Your Own Clothes
I am really excited about this method of sewing. It is helping me to accomplish my sewing goals in a big way.
If you are just starting out with sewing your own clothes in quantity, try sewing just three pieces. You will feel so accomplished once you have three new pieces at the end.
If this post was helpful go ahead an sign up for my newsletter for more sewing inspiration and ideas. We’ve got some give-aways coming up so stay tuned. Let me know in the comments what you are sewing this week, I’d love to hear from you!

Thanks for stopping by and happy sewing!
Adorei suas dicas de costura, principalmente as trocas de linhas. Quando a gente começa trocar cores fica um monte canelinhas pela metade de linha.
Obrigada pelas dicas. Abraços.