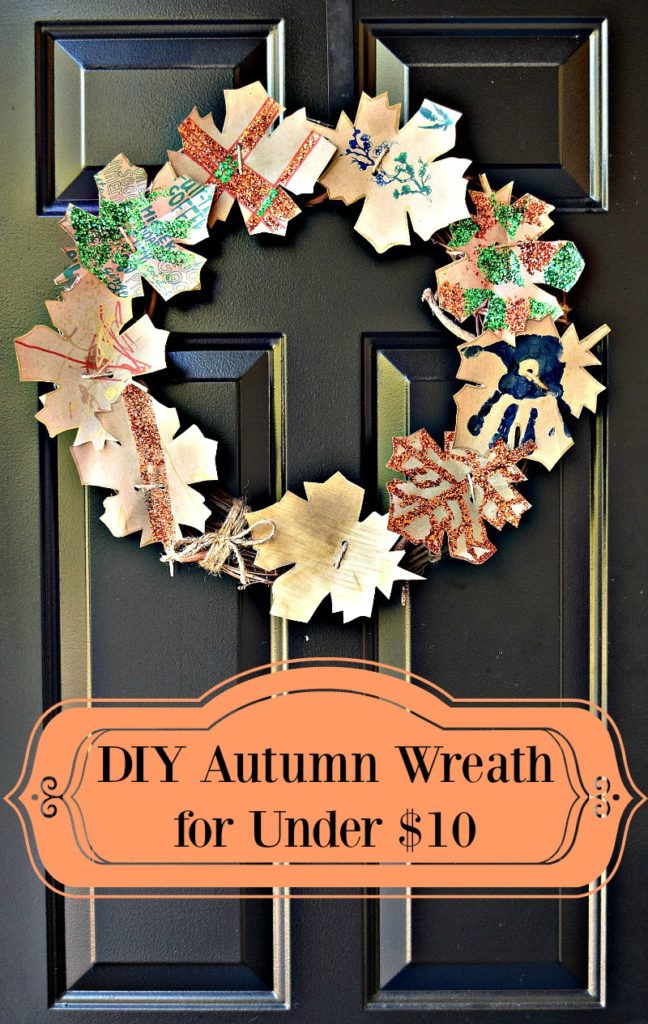
Fall is here! That means it’s time for warmer wardrobes, hayrides, and autumn decor! But even small home decor items can add up to costly sums when you are sprucing up your living space. Here is a beautiful autumn wreath that costs less than $10 to make and is fun for the whole family!
What you will need:
- One Wreath (I have one wreath that I am constantly changing the decor for. If you have an old Christmas wreath lying around go take all the stuff off of it and voila! You have a wreath to decorate. I got mine at Trader Joes a couple years ago. )


- Rubber Stamps
- Water Color Paints

- Anything else you could decorate, paper, with!
I was able to keep it under $10 because most of the above items I already had lying around from previous projects. If you don’t have everything mentioned on hand, look around and see what you DO have to decorate your leaves.
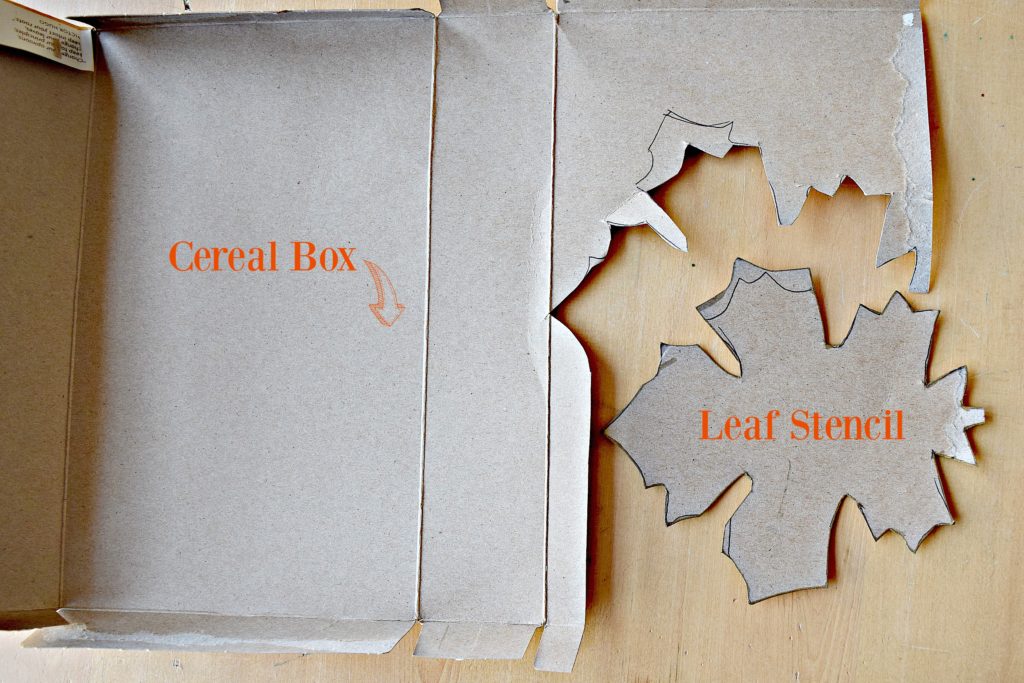
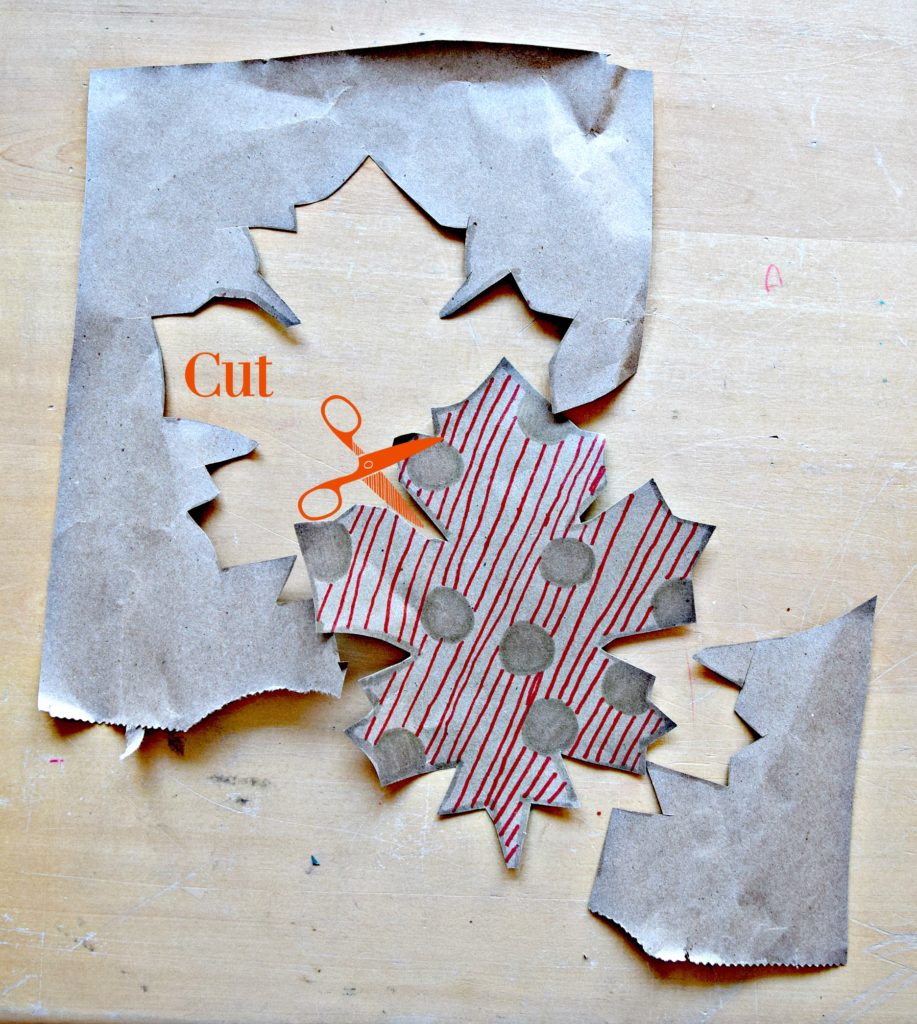
Make Leaf Stencil
Start by drawing a leaf on paper. I liked the shape of the maple leaf so I freehanded one or you could just trace an actual leaf you find outside. Once you have a leaf shape you like on paper cut it out. Trace the leaf onto the inside of an old cereal box and then cut out
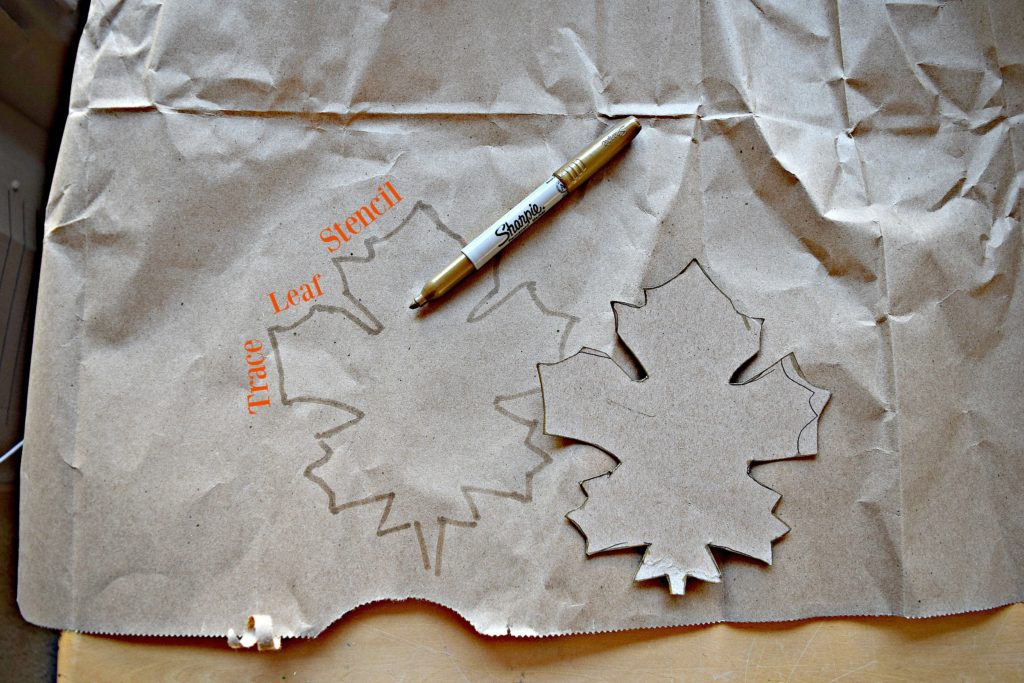
Trace Leaf Stencil
Stencil your leaf onto a paper bag. I used a gold Sharpie so that it would match the fall colors we used.
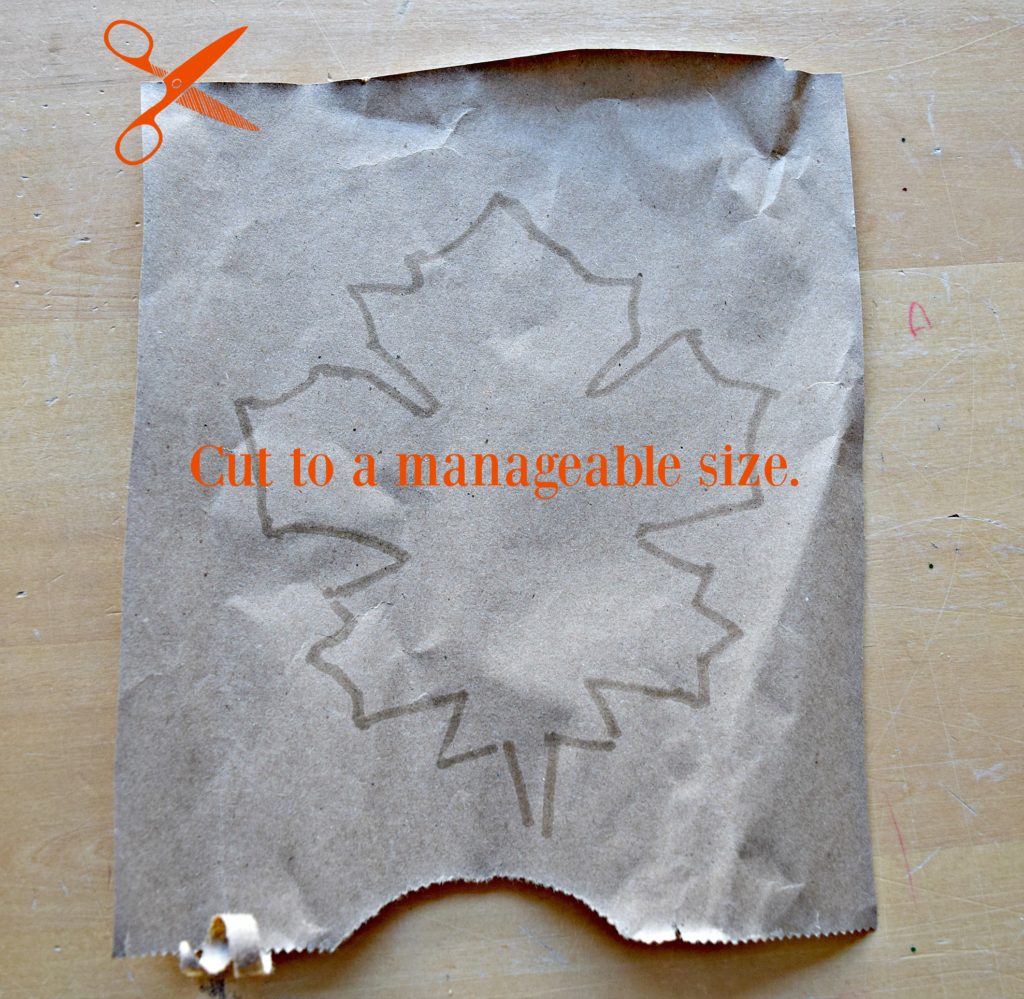
I found it was easier to decorate the leaves if you cut a simple rectangle around each leaf to start with.
Decorate!
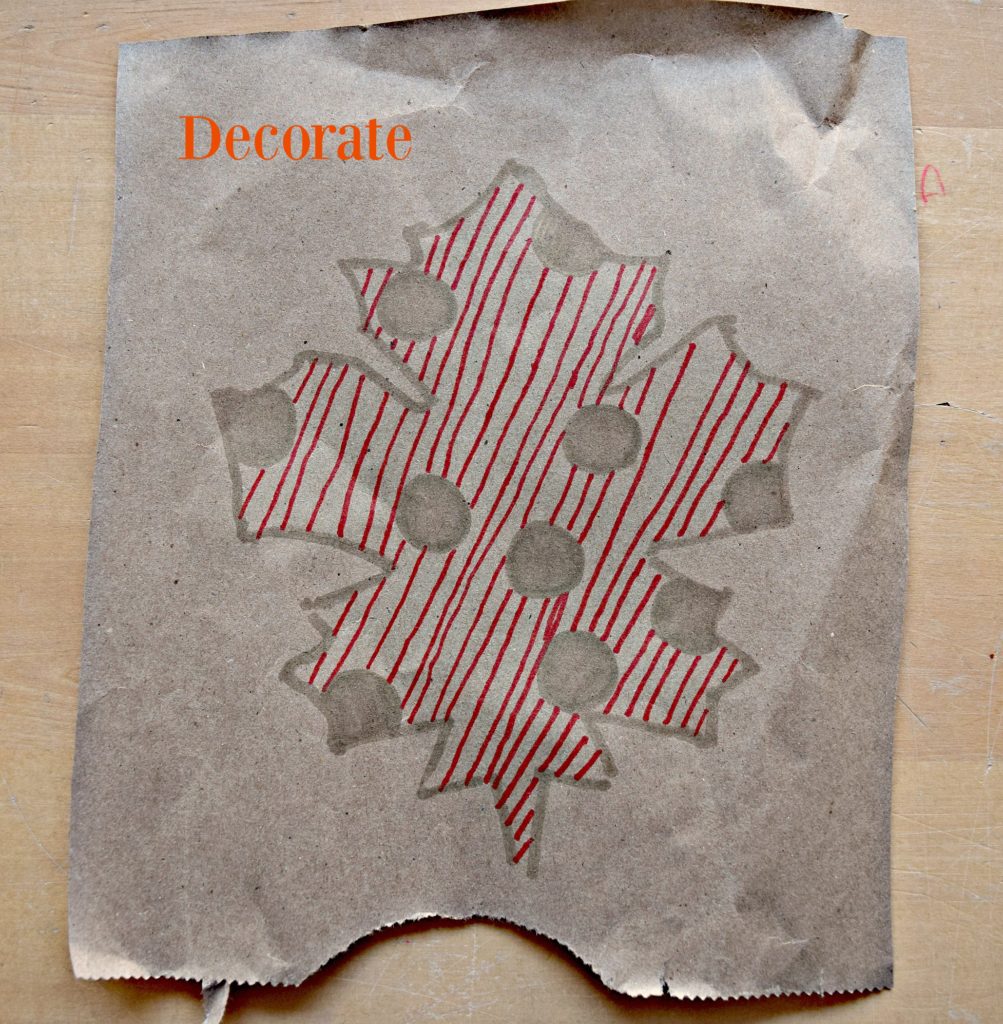
Here are some ideas of how you can decorate your leaves:
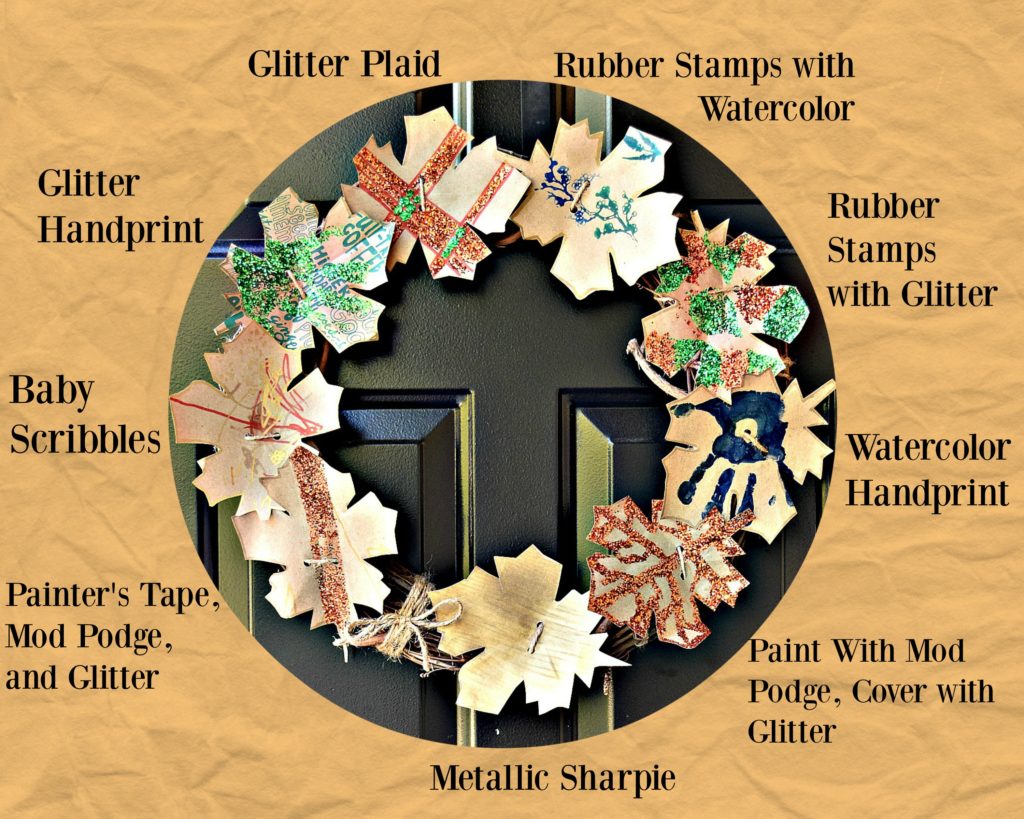
Glitter Plaid:
Draw parallel lines going in one direction with a permanent marker. Then draw parallel lines that intersect with those. Between your lines paint Mod Podge with a brush. Cover with glitter, pour off excess, and let dry. Next, paint Mod Podge between squares formed by intersecting lines and apply a different color glitter.
Rubber Stamps with Watercolor:
Paint rubber stamp with watercolor paint and stamp!
Rubber Stamps with Glitter:
Paint rubber stamp with Mod Podge and stamp onto paper. Cover with glitter, pour off excess, and let dry.
Watercolor Handprint:
Paint child’s hand with watercolor and gently press their hand down onto paper. Wash with a wet rag.
Cut Out Leaves
Punch Holes
Fold the leaf in half and insert the fold into hole punch. Punch through both layers for evenly spaced holes on each leaf.
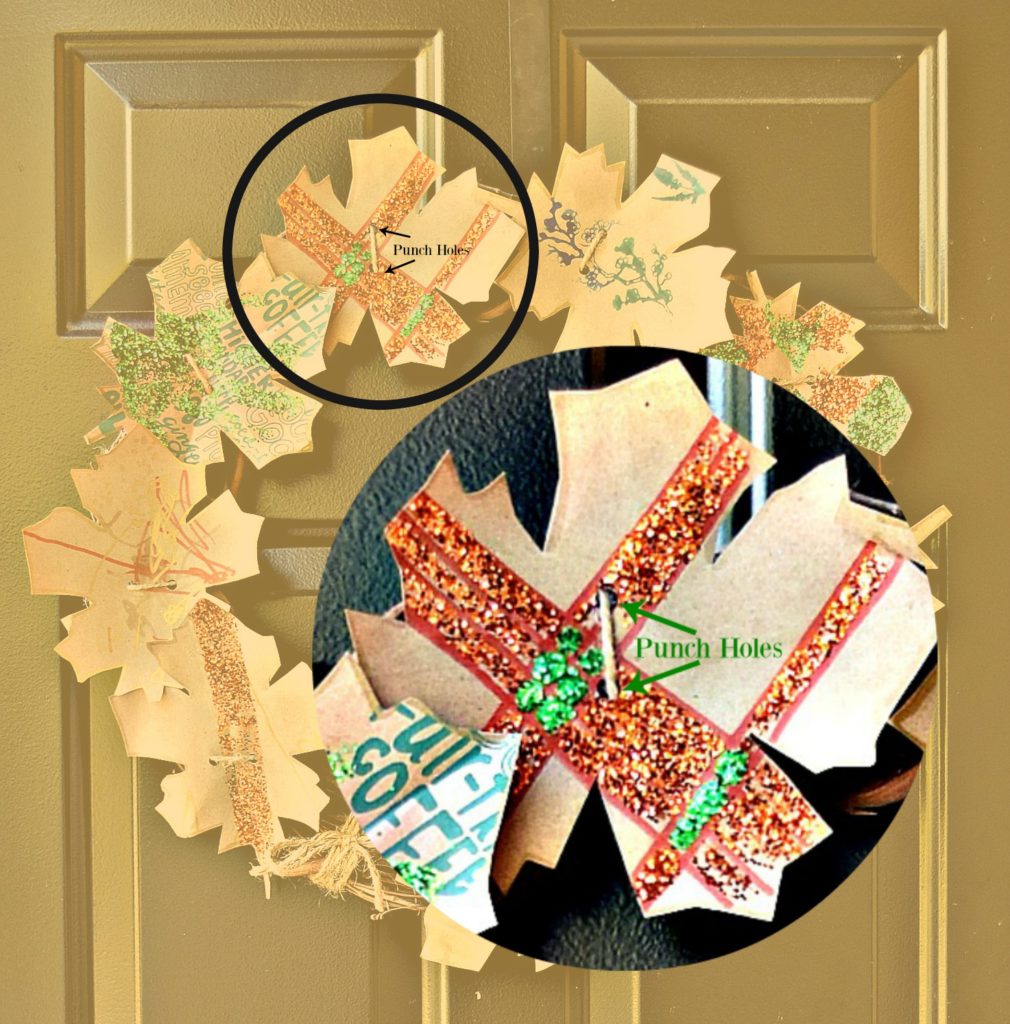
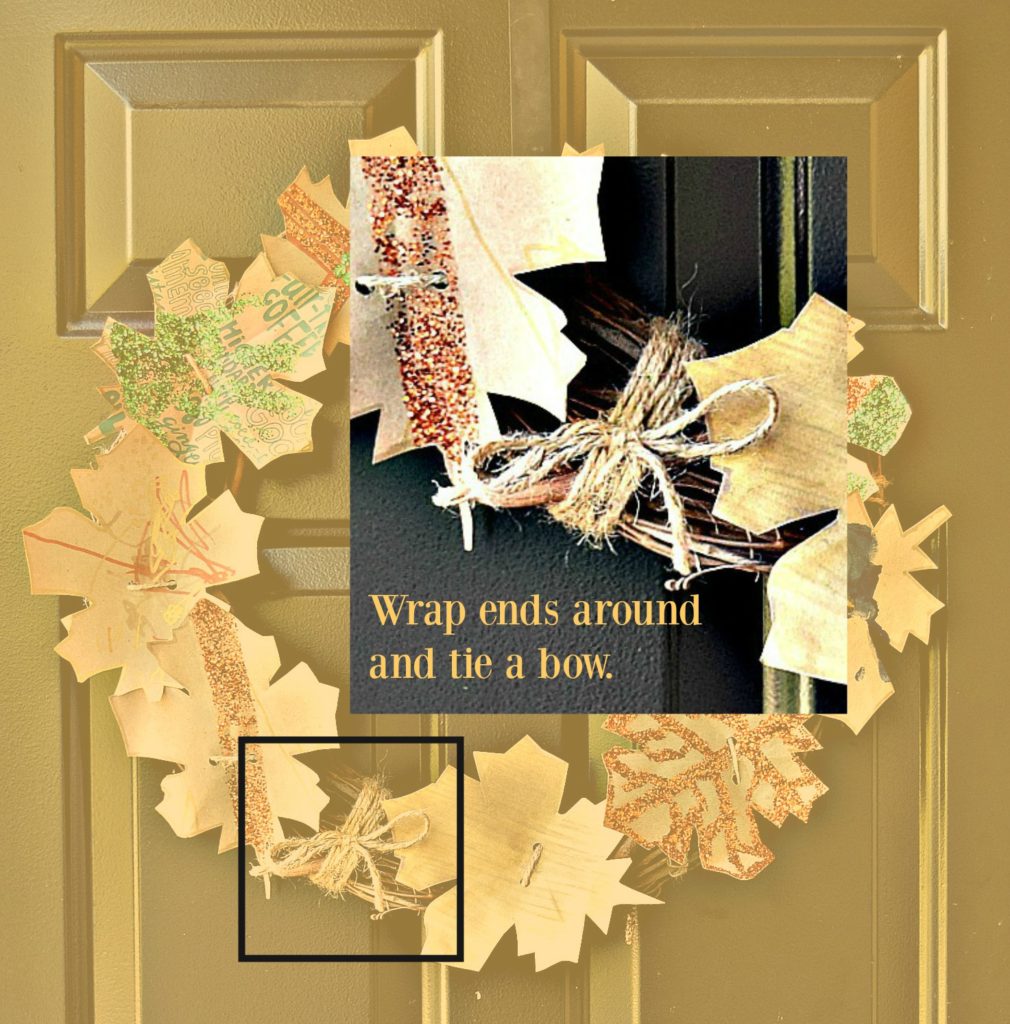
Attach Leaves to Wreath:
Run twine through the holes on each leaf and then wrap twine around the wreath. Leave a good amount of excess twine at the beginning so that you have enough to tie a decorative bow once you’ve added all of your leaves. Wrap around the ends of the twine many times and then tie a bow.
Note:
Since the leaves are made of paper they will not do well on a door directly exposed to the elements. This project is great for doors on covered porches or apartments. If you can’t put yours on your front door you could make a beautiful garland or centerpiece with your paper leaves.
What does your wreath look like?? I would love to see your autumn wreath and hear about some of your fall traditions. Leaf a comment below and subscribe to my newsletter for all the latest!